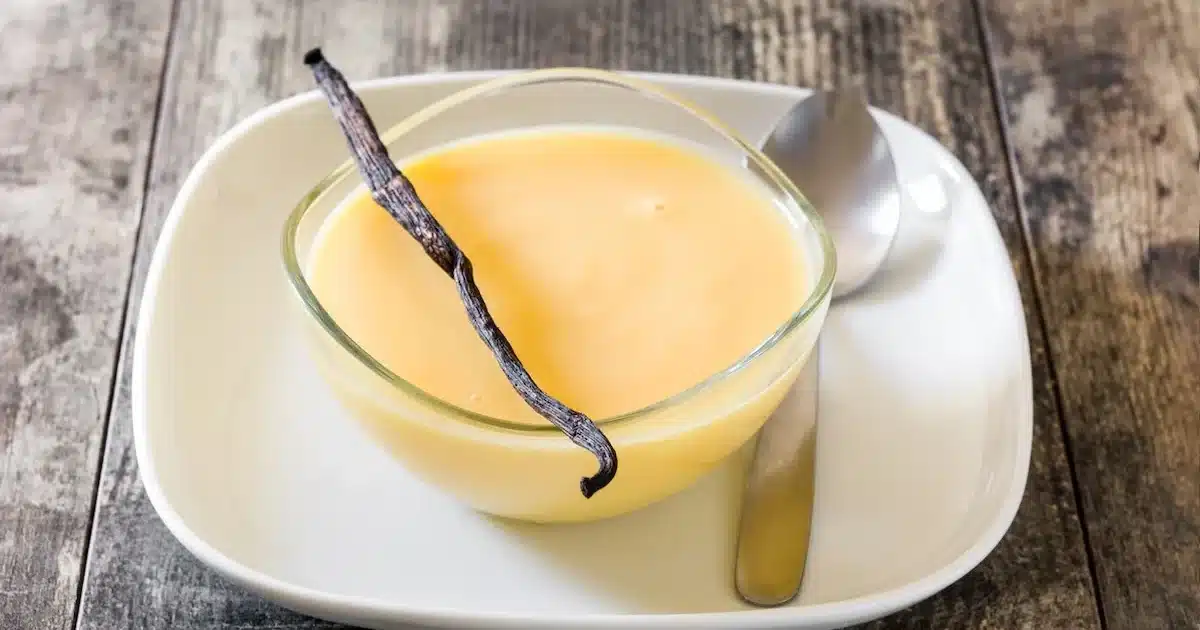
Homemade vanilla dessert cream is one of those recipes that takes just 10 minutes of active preparation, uses only 5 ingredients, and produces 6 generous pots of silky, indulgent cream that rivals anything sold in a store. Once you try it, going back to the commercial version feels unnecessary.
There's something quietly satisfying about recreating a childhood staple from scratch. Those small store-bought pots have a nostalgic pull, but making your own version at home gives you full control over quality, flavour intensity, and cost. And the process is far simpler than most people assume.
Only 5 ingredients for a genuinely creamy vanilla dessert
The ingredient list is short enough to memorise. You need 1 litre of whole milk, 1 vanilla pod, 80 g of sugar, 50 g of cornflour (cornstarch), and 2 egg yolks. That's it. No preservatives, no stabilisers, no unpronounceable additives.
The vanilla pod makes all the difference
The choice of vanilla matters more than it might seem. A real vanilla pod, split lengthways and scraped, releases hundreds of tiny seeds that infuse the milk with a deep, floral warmth. If budget is a concern, vanilla extract is a workable substitute, but the flavour will be noticeably less pronounced. When you're investing so little time in a recipe like this, using a proper pod is worth it.
After removing the pod from the hot milk, don’t throw it away. Rinse it, let it dry, and place it in a jar of sugar to make vanilla sugar for future baking.
Cornflour as the thickening agent
Cornflour (fécule de maïs) is what gives this homemade dessert cream its smooth, pudding-like texture. Unlike flour, it produces a cleaner, more translucent result without any starchy aftertaste. Combined with the egg yolks, it creates a custard base that sets beautifully once chilled. If you've ever made a creamy homemade hot chocolate from scratch, you'll recognise the same principle at work here.
The step-by-step method for perfect vanilla cream pots
The technique requires attention but no particular skill. The key is managing temperature carefully and mixing at the right moments.
Start by pouring three-quarters of the milk into a saucepan. Add the scraped vanilla seeds, the split pod itself, and the 80 g of sugar. Heat everything over medium heat until it reaches a gentle boil, stirring occasionally to dissolve the sugar.
While the milk heats, combine the cornflour, 2 egg yolks, and the remaining quarter of the milk in a mixing bowl. Whisk until completely smooth with no lumps, since lumps at this stage will not disappear later.
Once the milk reaches boiling point, remove the vanilla pod. Then pour the hot milk over the cornflour and egg mixture in a steady stream, stirring vigorously the whole time. This gradual incorporation prevents the eggs from scrambling.
Return the entire mixture to the saucepan. Heat over medium heat, whisking continuously, until the cream comes back to a boil and thickens noticeably. This takes just a few minutes. Keep whisking throughout to prevent the bottom from catching.
Pouring, cooling, and chilling
Remove from the heat and immediately pour the cream into 6 individual pots. Let them cool at room temperature first, then transfer to the refrigerator for at least 2 hours before serving. The cream firms up as it chills, developing that classic smooth, sliceable texture.
minimum chilling time for the cream to set properly
The result is a homemade vanilla custard cream that holds its shape in the pot while remaining silky on the spoon. If you enjoy making simple, satisfying desserts like baked apples or fluffy crepes, this recipe fits naturally into the same repertoire.
Why making dessert cream at home beats buying it
The commercial versions of these small vanilla cream pots are convenient, but homemade wins on almost every front.
- Only 5 natural ingredients
- No preservatives or artificial flavours
- Richer, more authentic vanilla flavour
- Fully customisable sweetness
- More economical per portion
- Often contain additives and stabilisers
- Artificial vanilla flavouring in cheaper versions
- Fixed sweetness level
- Higher cost per unit
Making your own also means you know exactly what goes into each pot. With only 5 ingredients, there's nothing hidden. The sugar level can be adjusted to taste, and if you want a more intense flavour, you can even use two vanilla pods. That kind of flexibility simply doesn't exist with a pre-packaged product.
And the effort involved is minimal. 10 minutes of active cooking, a brief wait for the cream to cool, and a couple of hours in the fridge. For recipes that are similarly quick and require very little equipment, the same logic applies whether you're making energy balls with three ingredients or a batch of these vanilla cream pots.
The homemade version also keeps well in the refrigerator, making it a practical option to prepare in advance for a weeknight dessert or a casual dinner with friends. Six pots from a single batch means the whole family is covered, with no last-minute supermarket run required.