Chocolate energy cereal bars made at home take less than 20 minutes from start to finish, require only 4 ingredients, and hold up for several days. They're a genuinely satisfying alternative to store-bought snacks packed with additives and excess sugar.
Store shelves are full of cereal bars dressed up as healthy options. But flip one over and read the label: the ingredient list often stretches into double digits, with syrups, emulsifiers, and flavors that have no business being in a snack. Making your own homemade chocolate cereal bars sidesteps all of that, and the effort is minimal.
This recipe produces 8 bars with just 200 g of oats, 100 g of chocolate, 50 g of maple syrup, and 50 g of coconut oil. That's it.
Only 4 ingredients, and every one of them works hard
The simplicity here is deliberate. Each ingredient has a functional role, not just a flavor one.
Oats as the backbone of these energy bars
Rolled oats are the foundation. At 200 g, they make up the bulk of the recipe and deliver what matters most in an energy snack: slow-releasing carbohydrates, fiber, and lasting satiety. They're not filler. They're the reason these bars actually keep you going through a morning at the office or a workout. If you want a completely different texture, puffed rice works as a direct substitute and produces a lighter, crunchier result.
Chocolate, maple syrup, and coconut oil
Dark or milk chocolate at 100 g provides both binding and flavor. Melted together with 50 g of coconut oil, it creates a smooth, glossy coating that holds the oats together once cooled. The coconut oil also lowers the melting point of the mixture slightly, making it easier to spread evenly in the mold.
Maple syrup at 50 g adds sweetness without the sharp spike of refined sugar. It integrates seamlessly into the chocolate-oil mixture and keeps the bars moist enough to cut cleanly without crumbling. If you're already thinking about how to reduce added sugar in your baking, a pastry chef's breakdown of how much sugar you can safely cut from a recipe is worth reading before you adjust this one.
The step-by-step process for homemade chocolate oat bars
The method is straightforward. No stand mixer, no special equipment, no chilling time required before baking.
- Preheat the oven to 180°C.
- Melt the chocolate and coconut oil together until smooth and glossy.
- Combine the rolled oats and maple syrup, then pour in the melted chocolate mixture and stir until fully coated.
- Transfer to a square mold lined with parchment paper (or a flat baking sheet) and press the mixture down firmly and evenly.
- Bake for 15 minutes.
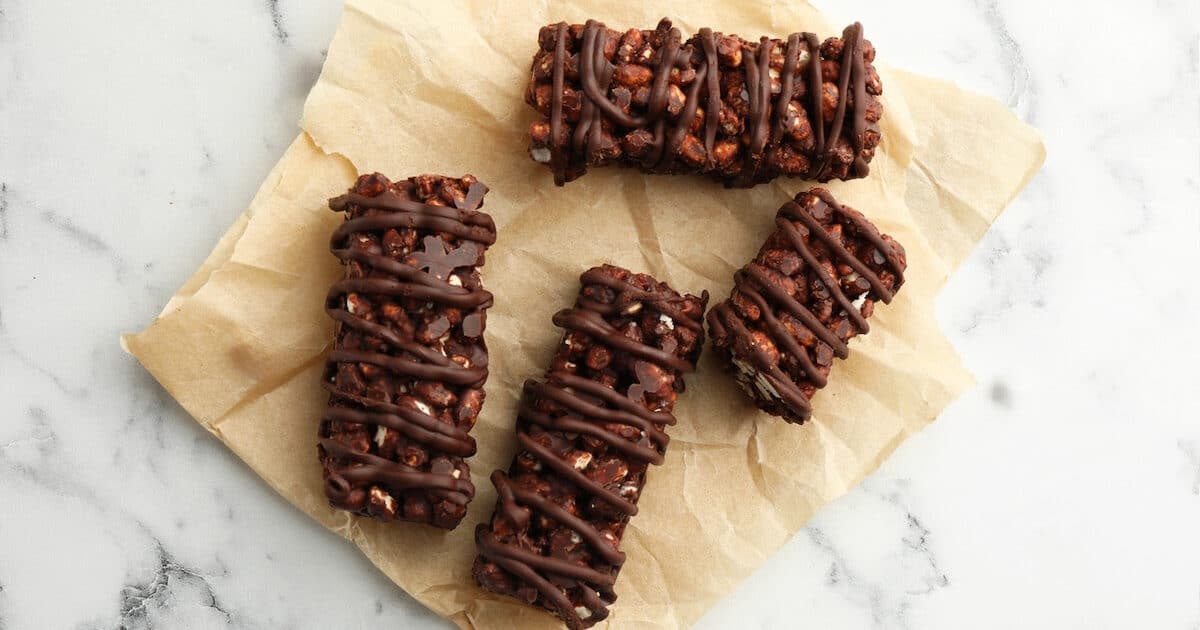
- Remove from the oven and cut into 8 bars immediately while still warm.
- Allow to cool completely before handling or storing.
Cut the bars right after they come out of the oven, not after cooling. Once fully set, the mixture becomes firm and cutting cleanly gets much harder.
The cooling step is non-negotiable. The bars need to set fully before they can be lifted, stacked, or wrapped. Rushing this step means they'll fall apart. But once cool, they hold their shape well and travel easily in a bag, a lunchbox, or a gym kit.
Smart variations that change everything
The base recipe is solid on its own, but a few additions can push it in interesting directions depending on who's eating and when.
Fleur de sel for a more complex chocolate flavor
A pinch of fleur de sel scattered over the top before baking is one of those small moves that makes a noticeable difference. Salt doesn't just add saltiness here. It amplifies the bitterness and depth of the chocolate, creating a contrast that makes each bite more interesting. It's the same principle used in high-end chocolate confectionery, applied to a five-minute prep.
Nuts and dried fruit for extra texture and nutrients
Nuts (almonds, hazelnuts, walnuts) add crunch and healthy fats. Dried fruit (raisins, cranberries, apricot pieces) adds chewiness and a natural sweetness that offsets the chocolate. Both can be mixed directly into the oat-chocolate blend before pressing into the mold. These additions also make the bars more filling, which matters if they're replacing a meal rather than supplementing one. For anyone already interested in quick anti-inflammatory snacks, adding walnuts or dried cranberries to this recipe fits right into that approach.
ingredients to make 8 homemade chocolate energy bars
A snack that works for every context
These bars were designed, informally, for real life. They're the kind of thing you make on a Sunday and eat through the week without thinking about it. Kids take them to school. Adults pack them for the office or the gym. They don't require refrigeration, they don't crumble in a bag, and they don't come wrapped in three layers of plastic.
The comparison to industrial versions is fair and unflattering for the store-bought alternatives. Commercial chocolate cereal bars tend to rely on glucose-fructose syrups, palm oil, and a range of stabilizers to achieve their shelf life and texture. This recipe achieves similar portability and longevity (several days at room temperature) with four clean ingredients.
And if you enjoy making your own pantry staples from scratch, homemade peanut butter with just 3 ingredients follows the same logic: fewer ingredients, lower cost, better result. The economic argument for homemade healthy energy bars is real. A batch of eight bars costs a fraction of what eight individually wrapped bars from a supermarket would run, with better ingredients across the board.
These bars keep well for several days at room temperature, making them ideal for batch preparation at the start of the week. Store them in an airtight container, layered with parchment paper to prevent sticking.
The recipe works for kids and adults alike, adapts to dietary preferences through simple swaps, and takes less active time than it takes to drive to a supermarket and back. For a snack that genuinely delivers on energy and satisfaction, the math is hard to argue with.